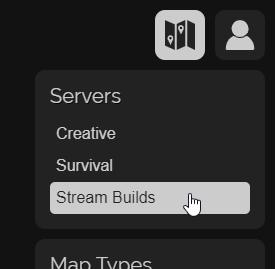
As of 1.0.0, LiveAtlas now supports multiple map backends ("servers") within one instance. This feature is designed to remove the need for maintaining multiple copies of LiveAtlas if you have multiple servers with maps. Configuring multiple servers will add a section within the map dropdown allowing the user to switch between them. An example of a multi-server configuration can be found here
This is considered advanced usage and a working knowledge of configuring webservers and CORS is expected.
How it works
When multi-server support is enabled in LiveAtlas, the URL will be appended with the server the user is currently viewing. For example, if LiveAtlas is hosted at https://example.com/map/ and the user is on the survival server, the URL will https://example.com/map/survival.
This subdirectory-based approach was chosen for its relative simplicity and because it allows for any old URLs to be redirected without losing information. Adding the server name to the URL hash was another option, but as hashes are not sent to the server redirects would lose any locations present in the initial URL. Fully configurable URLs would also add additional challenges when working within the limitations of the same origin policy and ensuring the relative asset URLs in index.html resolved correctly.
Requirements
-
LiveAtlas on an external webserver
Multiple server support requires LiveAtlas be hosted on an external webserver. The internal Dynmap/Squaremap/Pl3xmap webservers will not work for this as they do will not route the server URLs correctly.
-
All configured servers accessible externally via a browser
LiveAtlas needs to be able to make requests to each configured server from the visitor's browser. This means all of your configured server URLs need to be publicly accessible, and meet all browser imposed restrictions:
-
If your servers are accessed via a different origin to LiveAtlas itself, then you will need to ensure CORS headers are configured correctly.
Requests for map information should return an appropriate
Access-Control-Allow-Originheader as well asAccess-Control-Allow-Credentials: true. Headers for the Dynmap internal webserver can be configured using Dynmap's http-response-headers settingAlternatively, you can configure your webserver as a reverse proxy and make all individual servers accessible from the same origin LiveAtlas is hosted on, which will avoid this issue.
-
If LiveAtlas itself is served over HTTPS, your servers will need to be too in order to avoid mixed content errors.
-
Limitations
- Dynmap login/register will not work on servers accessed via a different origin to LiveAtlas itself, as Dynmap does not specify
SameSite=Nonefor its cookies.
Setup
-
Setup LiveAtlas at the URLs you want to use
LiveAtlas needs to be accessible via the URLs of all servers you wish to use. For example if you want your server maps to be accessible via
https://example.com/map/<servername>with servers namedcreativeandsurvival, you will need to ensure LiveAtlas is accessible viahttps://example.com/map/survivalandhttps://example.com/map/creative.A simple way to do this is to host LiveAtlas at
https://example.com/map/(note the trailing/) and configure your webserver to route requests for nonexistant files to LiveAtlas' index.html.Here is a an nginx configuration example which routes requests to non-existant files for
/map/URLs to LiveAtlas:location ~ ^/map/ { index index.html; try_files $uri /map/test/index.html; } # If you're hosting dynmap's php files in the same folder location ~ ^/map/.*\.php$ { fastcgi_split_path_info ^(.+\.php)(/.+)$; fastcgi_pass unix:/run/php/php7.4-fpm.sock; fastcgi_index index.php; include /etc/nginx/fastcgi_params; fastcgi_param SCRIPT_FILENAME $request_filename; }An apache example, which should be in an .htaccess file within
/map/:FallbackResource /index.html -
Configure LiveAtlas for multiple servers
Multiple server support is configured in index.html. Look for the
<script>containing thewindow.liveAtlasConfigobject and edit theserversproperty to include the servers you want to be accessible within LiveAtlas. The key of each server object will be used in the URL to access it.Each server object should contain a
dynmap,squaremap,pl3xmaporoverviewerproperty which contains the URLs necessary for displaying the map. Dynmap maps require several URLs which can be found in thestandalone/config.jsfile for the server. Squaremap, Pl3xmap and Overviewer maps require just the URL the map is currently viewable at. Making all URLs absolute is recommended to avoid ambiguity.An example with 2 dynmap servers named
creativeandsurvivaland additional Pl3xmap and Overviewer servers:window.liveAtlasConfig = { servers: { creative: { label: 'Creative', dynmap: { configuration: 'https://example.com/backend/creative/standalone/MySQL_configuration.php', update: 'https://example.com/backend/creative/standalone/MySQL_update.php?world={world}&ts={timestamp}', sendmessage: 'https://example.com/backend/creative/standalone/MySQL_sendmessage.php', login: 'https://example.com/backend/creative/standalone/MySQL_login.php', register: 'https://example.com/backend/creative/standalone/MySQL_register.php', tiles: 'https://example.com/backend/creative/standalone/MySQL_tiles.php?tile=', markers: 'https://example.com/backend/creative/standalone/MySQL_markers.php?marker=' } }, survival: { label: 'Survival', dynmap: { configuration: 'https://example.com/backend/survival/standalone/MySQL_configuration.php', update: 'https://example.com/backend/survival/standalone/MySQL_update.php?world={world}&ts={timestamp}', sendmessage: 'https://example.com/backend/survival/standalone/MySQL_sendmessage.php', login: 'https://example.com/backend/survival/standalone/MySQL_login.php', register: 'https://example.com/backend/survival/standalone/MySQL_register.php', tiles: 'https://example.com/backend/survival/standalone/MySQL_tiles.php?tile=', markers: 'https://example.com/backend/survival/standalone/MySQL_markers.php?marker=' } }, pl3xmapexample: { label: 'Pl3xmap Example', pl3xmap: 'https://example.com/backend/pl3xmap/' }, overviewerexample: { label: 'Overviewer Example', overviewer: 'https://example.com/backend/overviewer/' } } } -
Remove the
standalone/config.js<script>tagThis script is no longer required and should be removed to avoid an unnecessary request
-
Test
Visit the URL you are hosting LiveAtlas at (in our example
http://example.com/map/) and check everything works correctly. Make sure to test the individual server URLs (http://example.com/map/survival,http://example.com/map/creative,http://example.com/map/pl3xmapexampleandhttp://example.com/map/overviewerexamplein this case) as well.
If a server isn't configured correctly, LiveAtlas will display an error on the splash screen informing you of the problem. If the configuration is valid, try switching to all the configured servers and check they load correctly. If a server doesn't load correctly, check the browser console for more details on why and reconfigure as required.